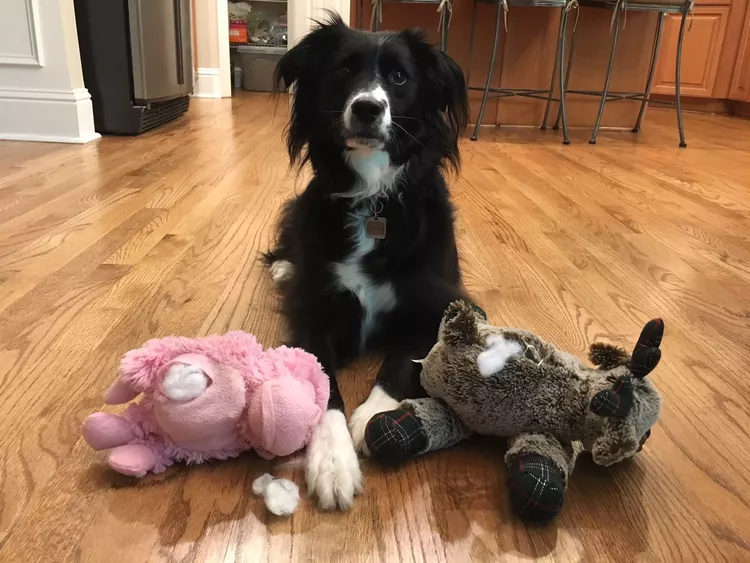
If you’re a dog owner, you know how quickly a beloved toy can go from brand new to torn and tattered. But before you toss it in the trash, consider giving it a second life! With a little creativity and effort, you can repair your dog’s favorite toy and make it just like new. As someone who’s always looking for ways to save money and reduce waste, I’ve picked up a few tricks for fixing dog toys. Here’s a step-by-step guide to help you breathe new life into your pup’s playthings.
1. Assess the Damage
The first step is to evaluate the toy’s condition. Is it just a small tear, or is it completely shredded? Small rips and loose seams are easier to fix, while heavily damaged toys might be beyond repair.
I’ve found that it’s worth trying to fix toys with minor damage, especially if they’re your dog’s absolute favorite.
2. Gather Your Supplies
To fix a dog toy, you’ll need a few basic supplies:
- Strong thread or dental floss
- A sturdy needle
- Scissors
- Fabric glue (for plush toys)
- Patches or extra fabric (if needed)
I’ve always kept a small sewing kit handy for quick repairs. It’s a lifesaver when it comes to fixing toys on the fly.
3. Clean the Toy
Before repairing the toy, give it a good clean. Hand-wash it with mild soap and water, or toss it in the washing machine if it’s machine-washable. Let it dry completely before starting the repair.
I’ve found that cleaning the toy not only makes it more hygienic but also easier to work with.
4. Sew Up Small Tears
For small rips or loose seams, use a needle and strong thread (or dental floss) to stitch the toy back together. Make sure your stitches are tight and secure to prevent your dog from tearing it open again.
I’ve learned that using a double thread or dental floss adds extra durability to the repair.
5. Reinforce Weak Areas
If the toy has weak spots that are prone to tearing, reinforce them with extra stitches or fabric patches. This can help extend the toy’s lifespan and prevent future damage.
I’ve found that reinforcing weak areas is especially helpful for toys that get a lot of rough play.
6. Use Fabric Glue for Plush Toys
For plush toys with small holes or loose fabric, fabric glue can be a quick and easy fix. Apply a small amount of glue to the damaged area and press the fabric together. Let it dry completely before giving it back to your dog.
I’ve used fabric glue for quick fixes, and it’s a great option if you’re not confident with a needle and thread.
7. Replace Stuffing
If the toy has lost its stuffing, you can refill it with new stuffing or even old socks or fabric scraps. Make sure to sew up the opening securely to prevent your dog from pulling the stuffing out again.
I’ve found that refilling a toy with new stuffing can make it feel brand new to your dog.
8. Add a Personal Touch
If the toy is looking a little worse for wear, consider adding a fun patch or embroidery to cover up any visible repairs. This can give the toy a fresh look and make it even more special for your dog.
I’ve enjoyed adding small patches or designs to my dog’s toys. It’s a creative way to make the repair process more fun.
9. Test the Toy
Once the toy is repaired, give it a quick test to make sure it’s safe for your dog. Check for loose threads, sharp edges, or anything that could pose a choking hazard.
I’ve always made it a point to inspect the toy thoroughly before giving it back to my dog. Safety is the top priority.
10. Rotate Toys to Reduce Wear
To prevent future damage, consider rotating your dog’s toys. This gives each toy a break and reduces the wear and tear from constant play.
I’ve found that rotating toys not only extends their lifespan but also keeps my dog interested and engaged.
Fixing a dog toy doesn’t have to be complicated. With a little time and effort, you can save money, reduce waste, and keep your dog happy. Plus, there’s something satisfying about giving a well-loved toy a second chance. So, grab your sewing kit and get to work—your pup will thank you!


+ There are no comments
Add yours